Without Programming
# Introduction
ToteBee let you create Data-Driven contents simply without programming. It runs on browsers, fetches CSV/JSON data, and renders them on the page.

# Motivation
When we create a web page with some data sets, it is not always necessary to use server side technorogy or a database. In some cases, it would be nice to complete in 5 minutes without programming.
# Features
- No-Programming : Just add some HTML tag attributes.
- No-Server : ToteBee works on browsers.
- Data-Driven : Runs with JSON or CSV file.
- 100% Pure JavaScript : Compatible with any other framework.
- Fast : The minified script size is only 6 KB.
# Home Page
# Demos
https://totebee.otasys.co.jp#demos
# Getting Started
Samle file structure:
.
└── public
├── css
│   └── totebee.css
├── data
│   ├── inventors.csv
│   └── inventors.json
├── js
│   └── totebee.1.0.min.js
└── hello.html
# Download
- Download the JS file from GitHub.
- Place the JS file
totebee.1.0.min.jsinto your project diretory such as/public/js/. - Add a
<script>tag to your<head>inhello.html: - If you prefer the same style as the demo page, also add a
<link>fortotebee.css.
<head>
  <title>Hello ToteBee</title>
  <script type="text/javascript" src="/js/totebee.1.0.min.js"></script>
  <link rel="stylesheet" href="/css/totebee.css" type="text/css">
</head>
# Making the data file
ToteBee supports CSV and JSON (JavaScript Object Notation) format. If you are familiar with JSON format, we recommend using it. JSON files are processed faster than CSV and are often more robust.
Sample Data:
| id | name | year | img |
|---|---|---|---|
| 101 | Thomas Edison | 1847-1931 | /img/edison.png |
| 102 | Graham Bell | 1847-1922 | /img/bell.png |
| 103 | Nicola Tesla | 1856-1943 | /img/tesla.png |
# CSV
id,name,year,img
101,Thomas Edison,1847-1931,/img/edison.png
102,Graham Bell,1847-1922,/img/bell.png
103,Nicola Tesla,1856-1943,/img/tesla.png
Make sure that the first line defines the column names id,name,year,img.
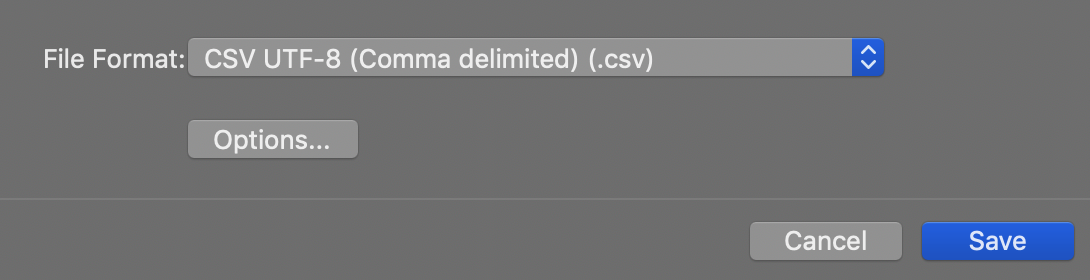
If the file contains multi-byte characters, select CSV UTF-8 (comma separated) in Excel.
# JSON
CSV can be converted into JSON online:
[{
"id": "101",
"name": "Thomas Edison",
"year": "1847-1931",
"img": "/img/edison.png"
  },
  {
"id": "102",
"name": "Alexander Graham Bell",
"year": "1847-1922",
"img": "/img/bell.png"
  },
  {
"id": "103",
"name": "Nikola Tesla",
"year": "1856-1943",
"img": "/img/tesla.png"
  }
]
Please make sure that your JSON file starts with [ , and ends with ] .
Trailing commas (sometimes called "final commas") are not supported.
As you can see below, there is no comma after "value3", "value6", "value9", and the last }.
[
{
    "key1":"value1",
    "key2":"value2",
    "key3":"value3"  <-- No comma
},
{
    "key1":"value4",
    "key2":"value5",
    "key3":"value6"  <-- No comma
},
{
    "key1":"value7",
    "key2":"value8",
    "key3":"value9"  <-- No comma
}  <-- No comma
]
# Uploading the data file
Upload the data file to your site before proceeding to the next step. In a browser, enter the URL of the data file and verify that the file can be downloaded from the server.
Example:
https://totebee.otasys.co.jp/data/inventors.csv
# Showing a List
# HTML
The minimal sample of HTML is here:
<html>
<head>
  <title>ToteBee</title>
  <link rel="stylesheet" href="/css/totebee.css" type="text/css">
  <script type="text/javascript" src="/js/totebee.1.0.min.js"></script>
</head>
<body>
<h2>ToteBee</h2>
<ul data-x="list" data-format="csv" data-src='/data/inventors.csv'>
<li data-x="item">
     <img data-src="{img}">
     <div>{name}</div>
     <div>{year}</div>
</li>
</ul>
</body>
# Specifing the data source
Add a <ul> tag with some data attributes:
<ul data-x="list"
data-format="csv"
data-src="/data/inventors.csv">
| attribute | value | meaning |
|---|---|---|
| data-x | list | Binding ToteBee List |
| data-format | csv | json | Data Format |
| data-src | /data/inventors.csv | Path to your data |
# Defining the template
Next, put the <li> tag as a template that iterates over the data.
As you can see, each column name is wrapped with curly brackets { and }.
 <li data-x="item">
     <a href="inventor.html?id={id}">
     <img data-src="{img}">
     <div>{name}</div>
     <div>{year}</div>
   </a>
 </li>
| attribute | value | meaning |
|---|---|---|
| data-x | item | template that iterates over the data |
| data-src | {column} | Specify the image path or URL |
When using <img> tag, use data-src attribute instead of src.
DON'T:
<img src="{img}">
DO:
<img data-src="{img}">
ToteBee replaces the data-src="{img} to src="/img/edison.png". If you write src='{img}', browsers try to download {img} before ToteBee replaces the string.
# Usage
# List
List is the most basic pattern of ToteBee. It fetches the CSV/JSON data, and render them with the template.
| attribute | value | meaning |
|---|---|---|
| data-x | list | Binding ToteBee List |
| data-format | csv | json | Data Format |
| data-src | /data/inventors.csv | Path to your data |
data-src='[path]'
aaa
<ul data-x="list" data-format="csv" data-src='data/inventors.csv'>
<!-- totebee item template -->
<li data-x="item">
    <a href="inventor.html?id={id}">
        <img data-src="{img}">
        <div>{name}</div>
        <div>{year}</div>
      </a>
</li>
</ul>
CSV Data
id,name,year,img
101,Thomas Edison,1847-1931,/img/edison.png
102,Graham Bell,1847-1922,/img/bell.png
103,Nicola Tesla,1856-1943,/img/tesla.png
(OR) JSON Data
[{
    "id": "101",
    "name": "Thomas Edison",
    "year": "1847-1931",
    "img": "/img/edison.png"
},
{
    "id": "102",
    "name": "Alexander Graham Bell",
    "year": "1847-1922",
    "img": "/img/bell.png"
},
{
    "id": "103",
    "name": "Nikola Tesla",
    "year": "1856-1943",
    "img": "/img/tesla.png"
}
]
# Table
The list pattern shown above can be apllied to the <tr> tag iteration in a <table> block.
This pattern can be used in various cases where repetition occurs in data records.
| ID | Image | Name | Description | Link to Static Page |
|---|---|---|---|---|
| {id} | {name} | {description} | inventor.html?id={id} |
<table>
<thead>
    <tr>
        <th>ID</th>
        <th>Image</th>
        <th>Name</th>
        <th class="hide_small">Description</th>
        <th class="hide_small">Link to<br>Static Page</th>
    </tr>
</thead>
<!-- totebee contents folder -->
<tbody data-x="list" data-format="json" data-src="/data/inventors.json">
    <!-- totebee item template -->
    <tr data-x="item">
        <td>{id}</td>
        <td><img data-src="{img}"></td>
        <td><a href="inventor.html?id={id}">{name}</a></td>
        <td class="hide_small">{description}</td>
        <td class="hide_small"><a href="inventor.html?id={id}">inventor.html?id={id}</a></td>
    </tr>
</tbody>
</table>
| attribute | value | meaning |
|---|---|---|
| data-x | list | Binding ToteBee List |
| data-format | csv | json | Data Format |
| data-src | /data/inventors.csv | Path to your data |
# URL Parameters
Parameters can be passed through the URL without using server side technology.
<a href="inventor.html?id=101">inventor.html?id=101</a>
<a href="inventor.html?id=102">inventor.html?id=102</a>
<a href="inventor.html?id=103">inventor.html?id=103</a>
If you are new to passing URL parameters, the following pages will help.
Wikipedia : Query string
surveygizmo : Use URL Variables to Pass Data
Operators The question mark, ampersand, and equals sign are operators used in the syntax of query strings/URL variables.
| sign | meaning |
|---|---|
| ? | The question mark identifies the beginning of the query string and must be placed at the end of the link, before the contents of the query string. |
| & | The ampersand is used before each subsequent variable/value pair in the query string. |
| = | The equals sign separates the variable from the value assigned to that variable |
# Record Filter
Record filter is used with the "List" pattern to extract only those records that fulfill a specified condition.
The condition is specified widh data-filter attribute of list block:
data-filter="id=101"
Other than =, <,<=,>,and >= are also supported.
Example:
<ul data-x="list" data-format="csv"
data-src="/data/inventors.csv"
data-filter="id=102">
<li data-x="item">
    <a href="inventor.html?id={id}">
        <img data-src="{img}">
        <div>{id}</div>
        <div>{name}</div>
        <div>{year}</div>
      </a>
</li>
</ul>
# If Statement
An If-Statement is used with List patern and show a specific HTML block when a record fulfill a specified condition.
<div data-x="if" data-condition="id=101">
    This area will show when the record id is 101.
</div>
<ul data-x="list" data-format="csv" data-src="/data/inventors.csv">

  <li data-x="item">

<a href="inventor.html?id={id}">
  <img data-src="{img}">
  <div>{id}</div>
  <div>{name}</div>
  <div>{year}</div>
  <div class="fixed-height-30">

    <!-- show block if id is 101 -->
    <div data-x="if" data-condition="id=101">
      <div class="highlight">Foo</div>
    </div>

    <!-- show block if id is 102 -->
    <div data-x="if" data-condition="id=102">
      <div class="highlight">Bar</div>
    </div>

  </div>
</a>
  </li>
</ul>
Please note that if block is placed inside the item block:
<li data-x="item">
    ...
    <div data-x="if" data-condition="id=101">
        ...
    </div>
</li>
# Using If Statement with Filter
"If Statement" can be used with a "Filter":
<!-- show items where id <= 105 -->
<ul data-x="list" data-format="csv"
data-src="/data/inventors.csv"
data-filter="id<=105">

<li data-x="item">
    {id}
    <!-- show block if id is 103 -->
    <div data-x="if" data-condition="id=103">
      -- Foo --
    </div>
</li>
</ul>
Result:
- 101
- 102
- 103
-- Foo --
- 104
- 105
# Pagenation
Pagination is automatically added by assigning the pagesize, the number of items displayed in one page.
data-pagesize='3'
In this example 3 items are displayed in one page.
<ul data-x="list" data-format="csv" data-pagesize='3' data-src="/data/inventors3.csv">
<!-- totebee item template -->
<li data-x="item">
    <a href="inventor.html?id={id}">
        <img data-src="{img}">
        <div>{id}</div>
        <div>{name}</div>
        <div>{year}</div>
    </a>
</li>
</ul>
# Customizing the design
The pagination tags are added behind the list as follows:
<ul class='pagenation'>
<li class='btn_currpage'>1</li>
<li>2</li>
<li>3</li>
<li>4</li>
</ul>
| tag | class | meaning |
|---|---|---|
| ul | pagenation | list for pagenation |
| li | btn_currpage | current page number |
# Sort
Items displayed in the list can be sorted in a specific order using a sort key by adding a data-sortkey attribute.
<ul id="mylist" data-x="list" data-format="csv"
    data-sortkey="id" data-src="/data/inventors3.csv">
| attribute | value | default value | meaning |
|---|---|---|---|
| data-sortkey | column name | none | the column name used as sort key |
| data-sortkeyType | string | number | date | string | data type of the sortkey |
| data-sortOrder | asc|desc | asc | ascending or descending order |
data-sortkeyType is used when comparing the variables.
When the data set is "1", "2", "3", "10", "12", "20",
If data-sortkeyType is string, the result will be:
1
10
12
2
20
3
The above result is similar to a book index.
If the data-sortkeyType is number, the result will be:
1
2
3
10
12
20
# Sort tabs
You can also create sort tabs with data-x="reload" attribute:
Sort tabs and the list are binded with id=" " attribute of the list.
In the example below, data-targetid="mylist" specifies the taegert list which has id="mylist".
Sort Key :
<span data-x="reload" data-targetid="mylist" data-sortkey="id" class='active'>ID</span>
<span data-x="reload" data-targetid="mylist" data-sortkey="name">Name</span>
<span data-x="reload" data-targetid="mylist" data-sortkey="year">Birth Year</span>
<ul id="mylist" data-x="list" data-format="csv" data-sortkey="id"
    data-pagesize='6' data-src="/data/inventors3.csv">
 ....
</ul>
<div class='content-ctrl-box'>
     <span class="label-sortkey">Sort Key :</span>
     <span data-x="reload" data-targetid="mylist" data-sortkey="id" class='active'>ID</span>
     <span data-x="reload" data-targetid="mylist" data-sortkey="name">Name</span>
     <span data-x="reload" data-targetid="mylist" data-sortkey="year">Birth Year</span>
</div>
<ul id="mylist" data-x="list" data-format="csv"
    data-sortkey="id"
    data-pagesize='6'
    data-src="/data/inventors3.csv">

    <li data-x="item">
        <a href="inventor.html?id={id}">
            <img data-src="{img}">
            <div>{id}</div>
            <div>{name}</div>
            <div>{year}</div>
        </a>
    </li>
</ul>
# Schedule
You can schedule a content block to go public at a specific date and time.
| attribute | example value | meaning |
|---|---|---|
| data-start | "2019-01-01 00:00" | the date to start showing |
| data-end | "2019-01-01 00:00" | the date to end showing |
data-start is used to specify the date to start showing the block:
<div data-x="schedule" data-start="2020-12-25 00:00" >
This block will be displayed after 2020-12-25 00:00
</div>
data-end is used to specify the date to end showing the block:
<div data-x="schedule" data-end="2020-12-25 00:00" >
This block will be displayed until 2020-12-25 00:00
</div>
Both data-start and data-end can be used on the same block.
Example Code:
<div data-x="schedule" data-start="2019-01-01 00:00" data-end="2019-12-31 23:59">
This block goes public on 2019.
</div>
<div data-x="schedule" data-start="2020-01-01 00:00" data-end="2020-12-31 23:59">
This block goes public on 2020.
</div>
<div data-x="schedule" data-start="2021-01-01 00:00" data-end="2021-12-31 23:59">
This block goes public on 2021.
</div>
Example Result:
# Deploying
# CORS
Cross-origin resource sharing (CORS)
Wikipedia : Cross-origin resource sharing
Cross-origin resource sharing (CORS) is a mechanism that allows restricted resources on a web page to be requested from another domain outside the domain from which the first resource was served.
Mediun : Understanding CORS
CORS is a mechanism which aims to allow requests made on behalf of you and at the same time block some requests made by rogue JS and is triggered whenever you are making an HTTP request to:
- a different domain (eg. site at example.com calls api.com)
- a different sub domain (eg. site at example.com calls api.example.com)
- a different port (eg. site at example.com calls example.com:3001)
- a different protocol (eg. site at https://example.com calls http://example.com)
# Contributing
Pull requests are welcome. For major changes, please open an issue first to discuss what you would like to change.
# License
Copyright (c) 2020 Naoki Ota
Licensed under the MIT license.